KOR
Search

SMT24 rear cover disassembly / Replacement of Sensor Board and Sensor > Notice

    Notice

    SMT24 rear cover disassembly / Replacement of Sensor Board and Sensor

    PAGE INFORMATION

    NAME 최고관리자 COMMENT 0 HIT 246 DATE 24-07-25 13:02

    CONTENT

    1. Remove the screws on the side of the body
      AD_4nXe1ZL2ctQfeRwsg5pQm9VXSnB6UYvAmZId8orjui6RVDqs5TVh7JcIIChFzFsNdxeIwVfxS2fGk66SUX6Dxx8QzQum6jzKKpLxTIDPxvGQ2YU_TLumPbeuwVrhpFbNhheSdu-hZuMIpEOtRGtVdhRePCkST?key=Xx5dL5GVw3BMaBoIQ3AI3A


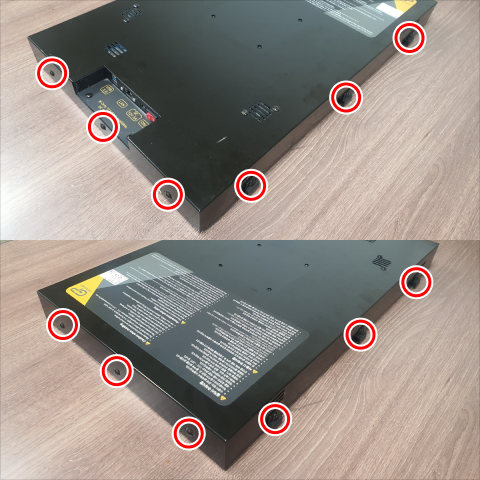
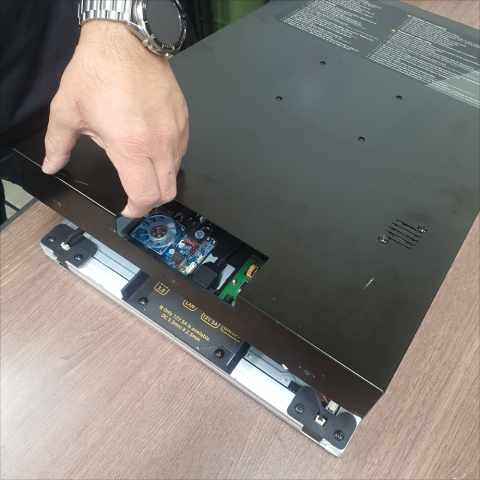
    1. Remove the rear cover
      AD_4nXdzot7gpCpzhtZt9uxA3nkmFosoR69Irw2syrMD5rQlGI0cKGlrEJlyLwtpfpPM56AFR7tMeBMfkn9G0otrxTtBewQFrGZJZ_G_o_YcatGpuVcViR1YY-y4Q_ySPTlwaJcJEk_StO3wo_5YmHL9iMz2P9pH?key=Xx5dL5GVw3BMaBoIQ3AI3A


    1. Check the cables connected between the cover and the board
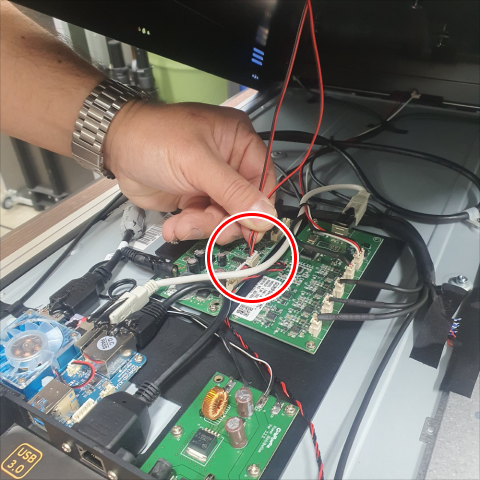
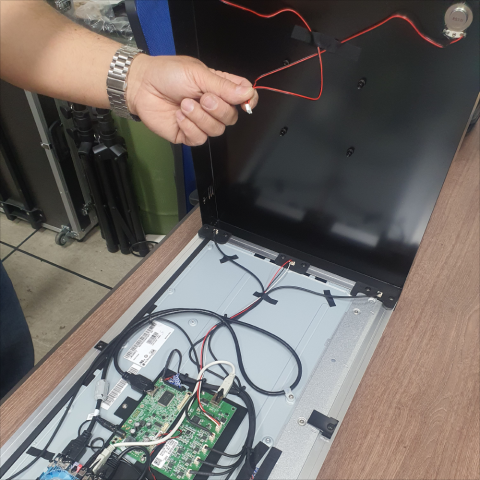
      AD_4nXcxFR1K1XadMwBItPvORMLhBjsp_SXMJ_jflZg3Y-MpVMceah3AreP-rpR4eQGjtecl1Bp62zsa0_bmvOVZIcd0YyqsgltA7MmYzz_63tbjZPygf80RcDdvE8r45XqYBtbr1fDZ8cHtu114PmmuGmvjElFd?key=Xx5dL5GVw3BMaBoIQ3AI3A


    1. Remove the cable
      AD_4nXe_dlJpjZ0JjMZuyunAqmz7dIZS7_f2KY5B5wBSh8EXpqk3BXQhHAnjkHGYvjCE24XcaGUwDI8nqgd1mgxoTdUClJemVebhqLBluO7GOH93E_Y_2zZ2KuoIcSIRJD3CObOR0J0HWKOG4FpZPy62P2mngP7_?key=Xx5dL5GVw3BMaBoIQ3AI3A


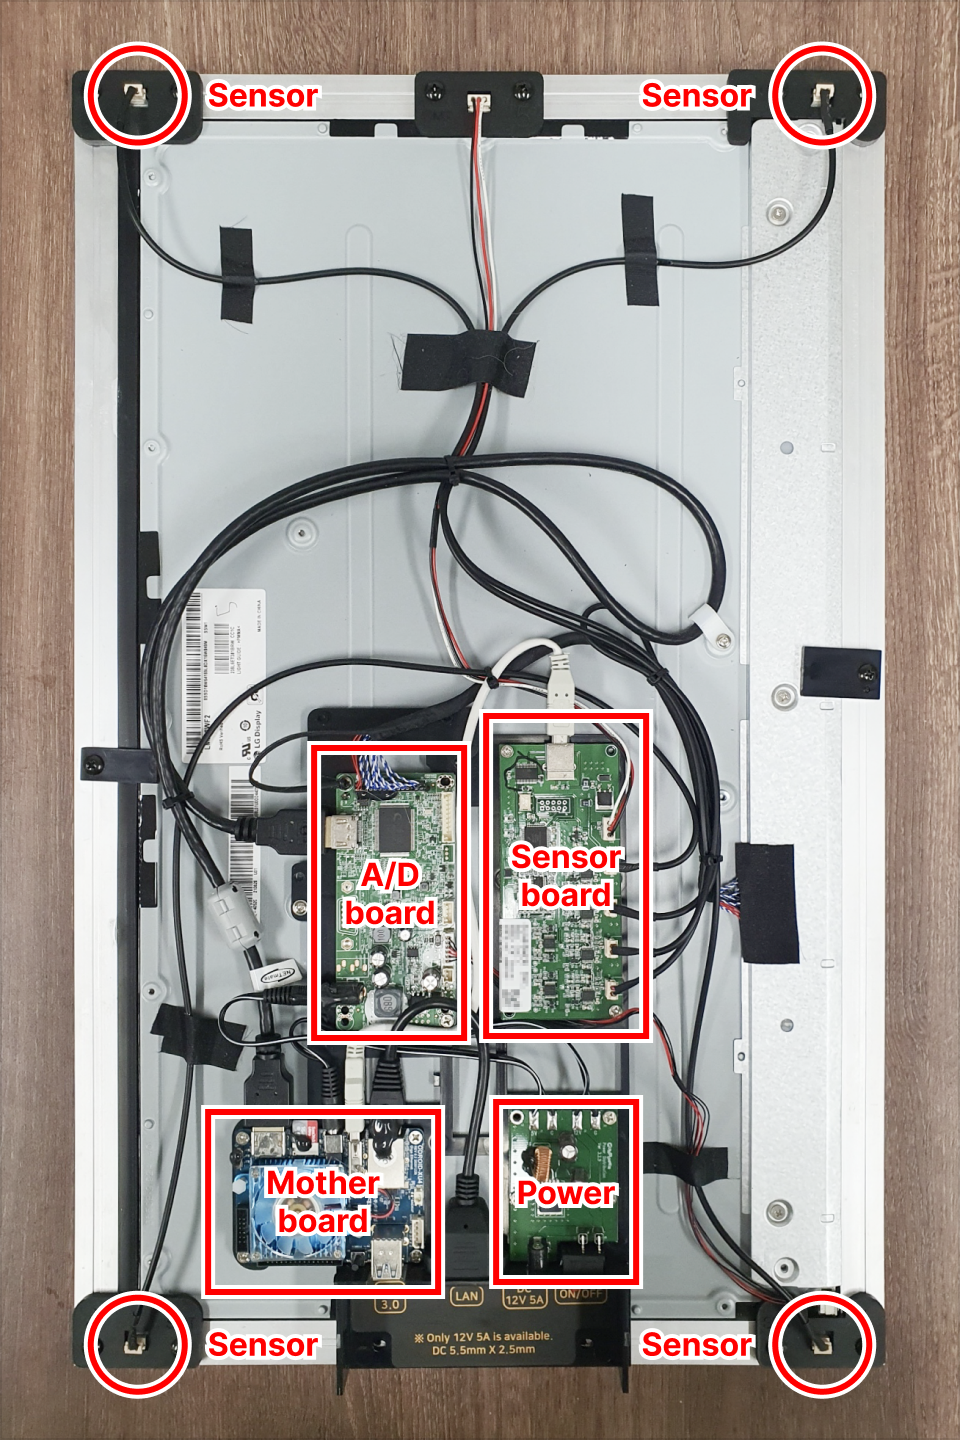
    1. Identify the location of the main parts.
      AD_4nXdkG_PfK6mc6GrPzmqi2oCBa83nevRy4TXkFGa_ljr-bqwHlnQPHr6cizMK1OtdH_OqZ2_4KBsJybbUI7VpLAXUhv_ZRY-zfG-PrhtgBe_Of6zJ0VsjtgrTQy38H0fB561zV7qiVP9HJrs3bbiuHeheiMFH?key=Xx5dL5GVw3BMaBoIQ3AI3A


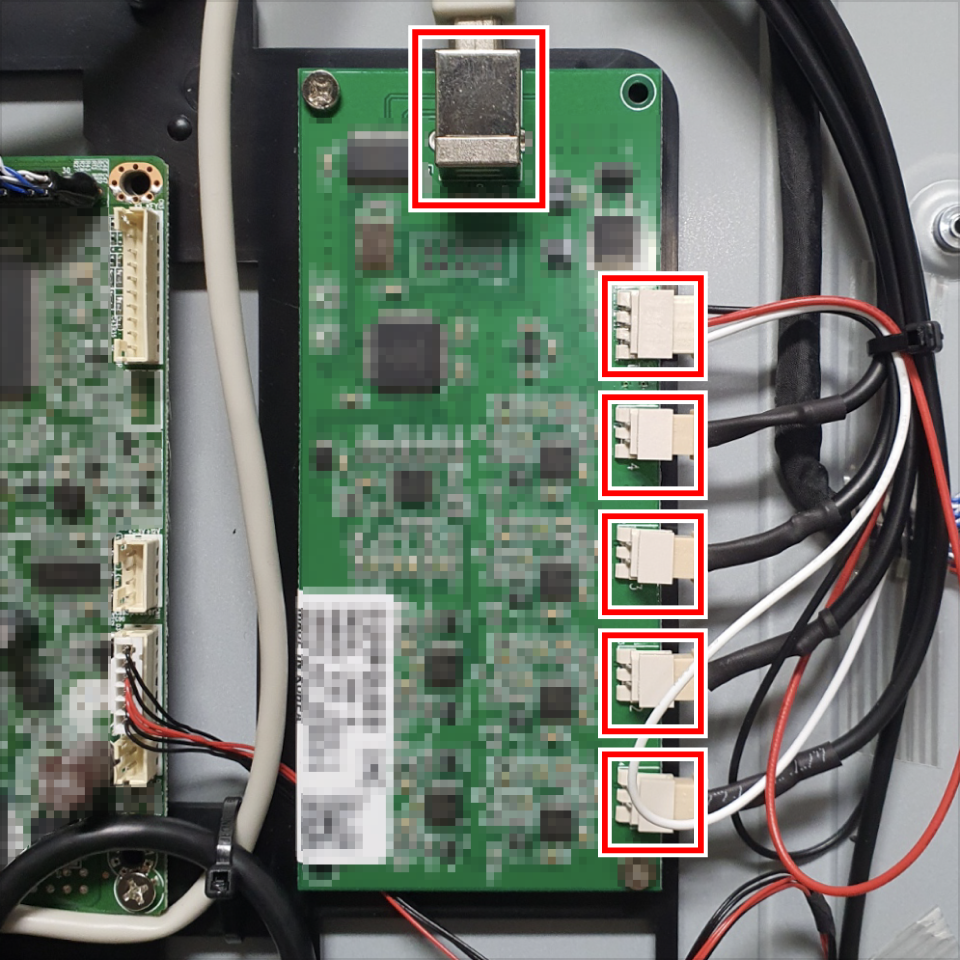
    1. Disconnect all cables connected to the sensor board.
      AD_4nXfj6DPd1h4XfrBSaZfu23xl9PAGo1qQr_NovoVi3XaEsNenAarwOEzgz7wv7-KCtqAXy_rzFTKJIzoM4rEE27CuOJ6cZKKVYxJWzNV0pF_5bvOJUaau1QTvCdedHk1y-jf980rlKOSB0I3Dwl5gz2KuFyE9?key=Xx5dL5GVw3BMaBoIQ3AI3A


    1. Unscrew and replace the sensor board.


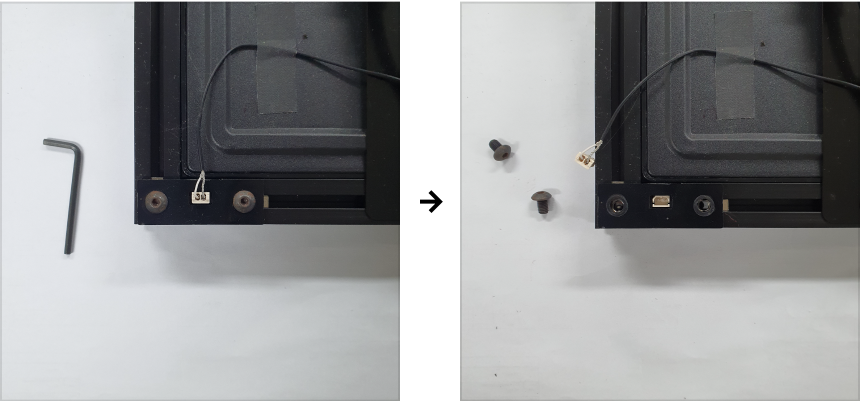
    1. Disconnect the cable and screw connected to the sensor.
      AD_4nXe8BKz7vn8PctX_-MBCQJdTSVmJkuylY-YPYUWTnCHCogZeFnbGeteYRvG8ogN8YyvtWFVfiaCp8zXT6k8hixaV149OgT0tEg9W0acI0XRbgHlF-joo2tfUCWwn3e07jjBGTPb3DRpl1IDXcXzObE7DdOuI?key=Xx5dL5GVw3BMaBoIQ3AI3A


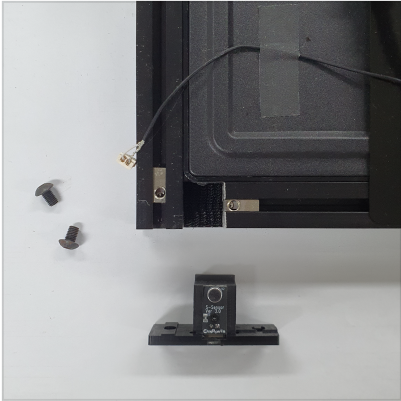
    1. Remove the sensor and replace it with a new one.
      AD_4nXdmANUYfH72dM4J46jspxcEUlJeyGL_BBoWOTe80Y-mqDKxrGeVQ8yBADhSI_IAjWeCGYYMRXf_ZnsoB33aBWwPhoKAOs7wzVWUhIJGZWvN8JdWPTzWgzZBeBXNJO1Hvg1OG38iplh-8BsF_RJpgJtZNY8?key=Xx5dL5GVw3BMaBoIQ3AI3A


    1. Reassemble in the reverse order.

    LIST OF COMMENTS

    NO COMMENTS HAVE BEEN REGISTERED.